
MySQL is one of the world's most popular database systems. Setting it up on Windows 11 is straightforward, and this guide will help you do just that. Let's get MySQL Server up and running on your machine!
1. Download the MySQL Installer
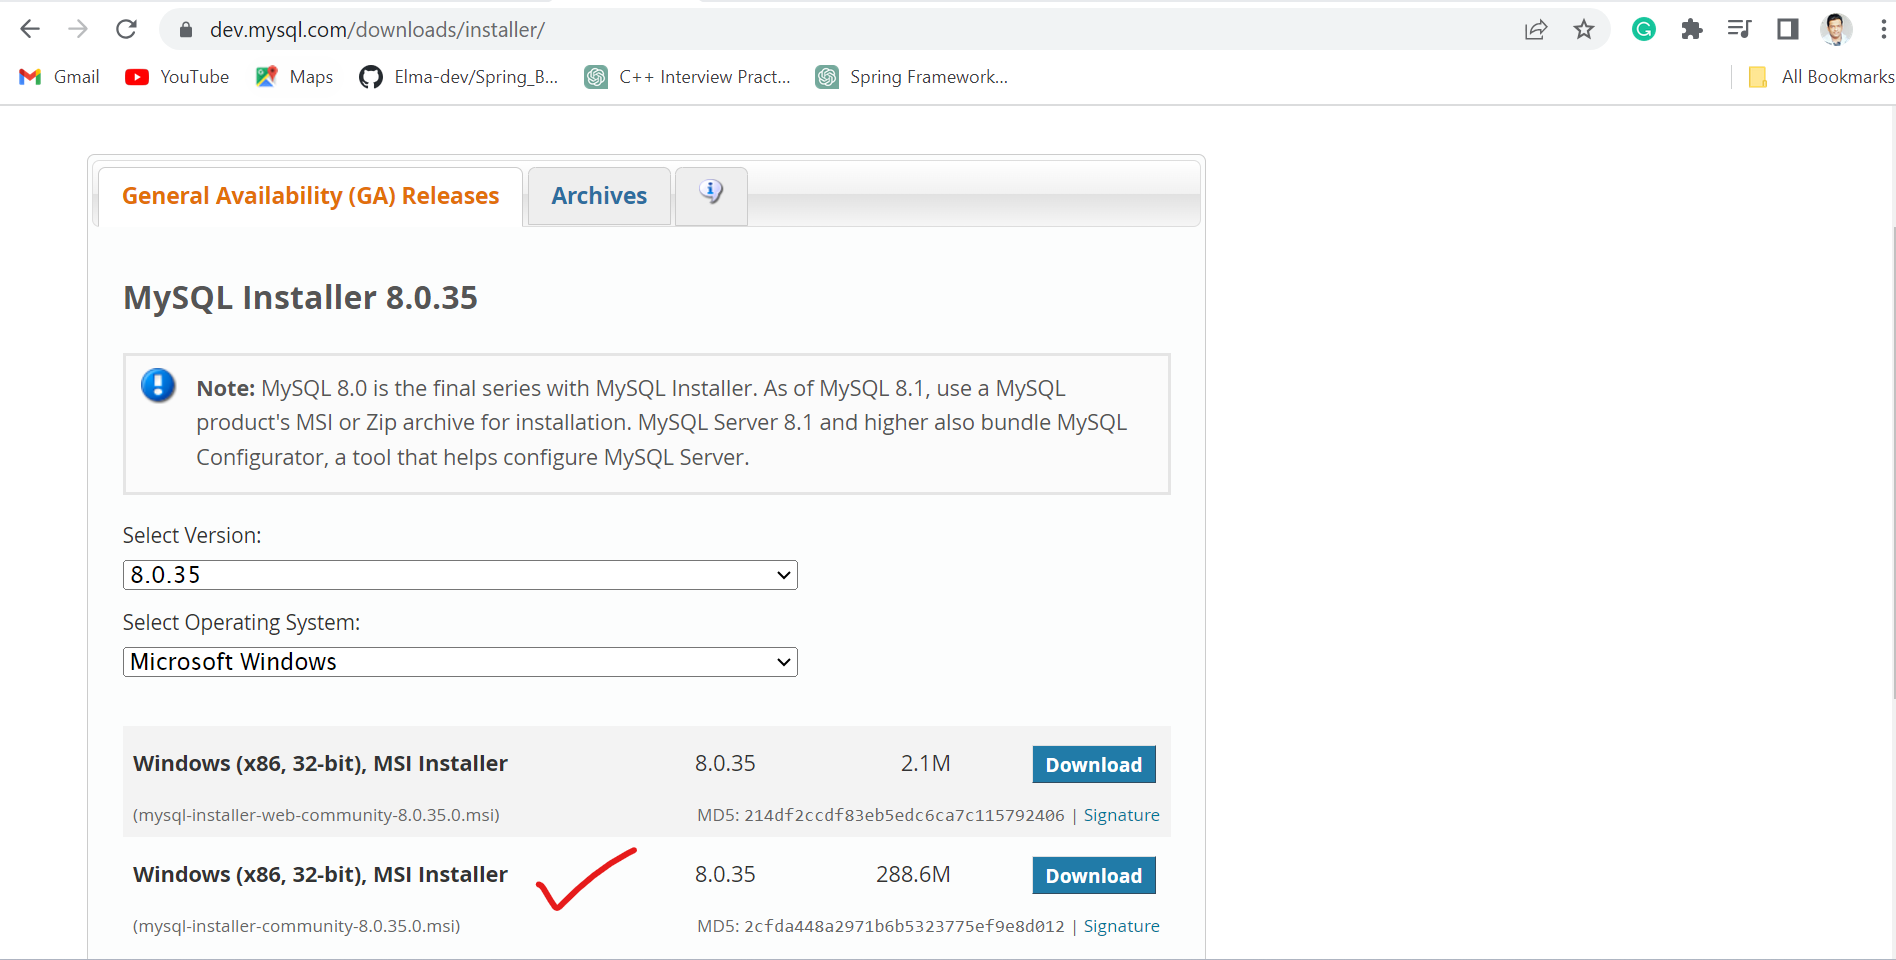
- Go to the official MySQL downloads installer page: MySQL Community Downloads.
- Choose the installer file appropriate for your system. For most users, the "Windows (x86, 32-bit), MSI Installer" will be suitable. There are typically two choices:
- Web-community: A smaller installer that will download the necessary components during installation.
- Full: A larger installer that includes all the required files.
- Download the installer as shown in the below screenshot.
2. Run the MySQL Installer
- Navigate to your download location and double-click the MSI file to start the installation.
3. Choosing Setup Type
- The installer will offer several setup types like Developer Default, Server only, etc. For a general MySQL server setup, choose Server only.
- Click Next.
4. Installation
- Click Execute to start the installation of the selected products and features.
- Once the installation is complete, click Next.
5. Product Configuration
- Click Next on the product configuration screen.
- Type and Networking: Choose the default settings and click Next.
- Authentication Method: Choose "Use Strong Password Encryption for Authentication" and click Next.
- Accounts and Roles: Set the root password for your MySQL server. You can also add user accounts, but it's essential to remember the root password.
- Click Next.
- Windows Service: Let the installer set up MySQL as a Windows service so it starts on boot. Ensure "Start the MySQL Server at System Startup" is checked. You can modify the Windows Service Name if desired.
- Click Next.
- Apply Configuration: Click Execute to apply the configurations. After the configuration process completes, click Finish.
6. Installation Complete
- Click Next on the product configuration screen.
- Finally, click Finish to complete the MySQL Server installation process.
7. Verify the Installation
- You can verify the installation by opening the Command Prompt and typing:
mysql -u root -p - Enter the root password when prompted. If everything is correct, you'll be given a MySQL command prompt.
Conclusion
You've now successfully installed MySQL Server on Windows 11. To manage your databases more efficiently, consider also installing MySQL Workbench, which offers a GUI for database management.
Comments
Post a Comment